Adding Google Analytics to Your Jekyll Website

Hey everyone! As a first post, I’m going through the steps I followed to get Google analytics up & running on my website.
Getting started
First, if you haven’t already, head over to Google Analytics and set up an account.
Next, press the Admin cog in the bottom left and choose “Create Account.”
Add Website Tracking to your webpage
After creating my account, I needed to link my Google Analytics Tracking ID to my web site. The tracking info is located in Admin > Tracking Info > Tracking Code. You should see a screen similar to the one below.
![]()
Here I can find my unique Tracking ID and a code snippet provided by Google under the Global Site Tag heading. This tag needs to be in the <head> of every page I wish to track. Thankfully, Jekyll enables me to do this quite easily!
First, I created a new file called analytics.html and placed this in my _include directory. Next, I added the line tracking_id: UA-00000000-0 to my _config.yml file.
The Global Site Tag tracking code should appear as the first item in the <head> tag. My _includes/head.html looks as follows:
<head>
    {% if site.tracking_id %}{% include analytics.html %}{% endif %}

    <!-- The rest of your head content here -->
</head>
Since values in Liquid are “truthy,” this prints analytics.html at the top of the <head> tag if tracking_id is anything except nil or false.
Create a Filter
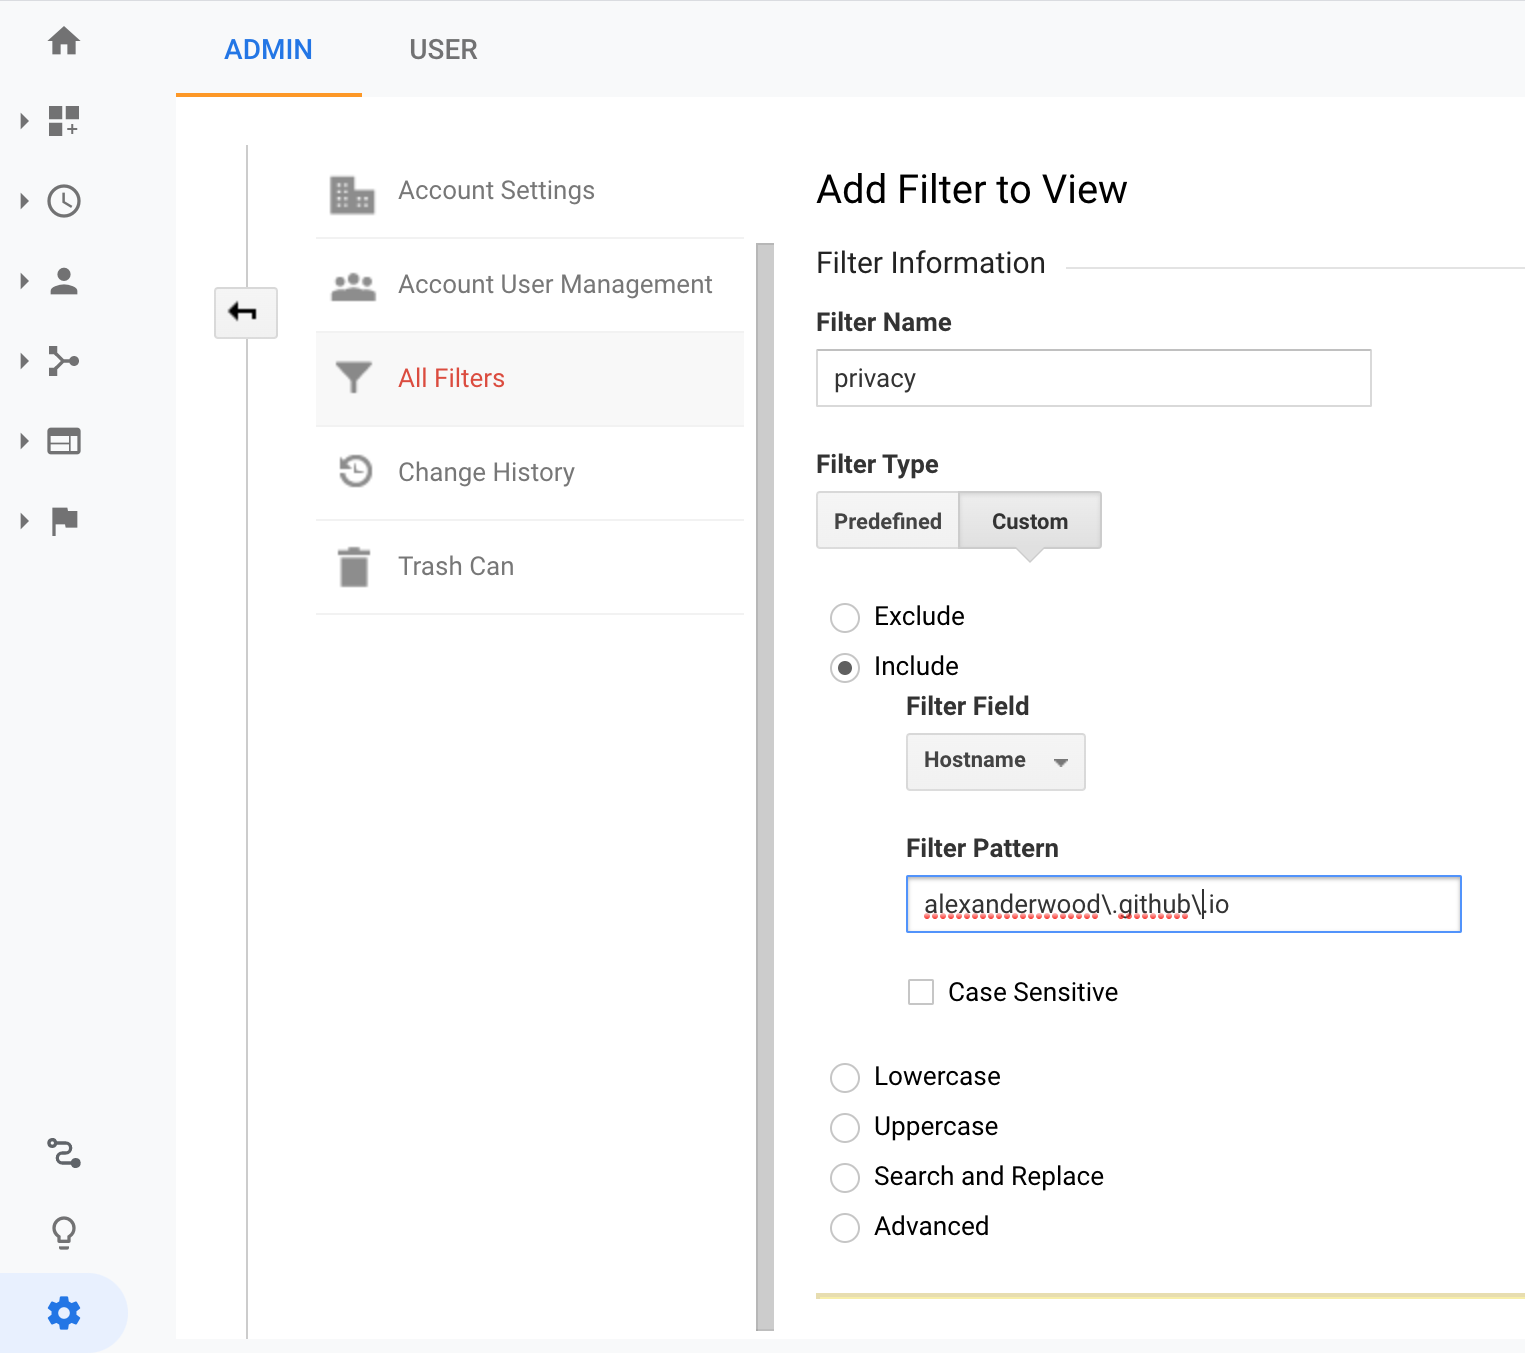
Next, I wanted to make sure that no one could use my Analytics ID to send data from other sites. To do this, I created a custom filter to only include traffic that comes from my site in my Analytics.
Go to Admin > All Filters and select Add Filter. Then,
- Name your filter whatever you like.
- Select Custom for filter type.
- Next, choose the
Includeoption. - From the Filter Field dropdown menu, pick
Hostname. - Put your web address in the Filter Pattern field. Replace
.with\.in order to interpret the period character literally. For instance, I typedalexanderwood\.github\.io. - Add
All Web Site Datato Selected Views. - Press save!
This process will look something like the screenshot below.

I hope this was helpful!